Monday, February 10, 2014

Love Potion #9

Hey Hey my fellow crafters! 

I wanted to pop in and show you all the projects I've made so far with my Paper Bakery Kits!! I've gotta say, I am LOVING these kits so far! They are so versatile and mixable! I love that you can use them for Valentine's Day layouts, but you don't necessarily have to! 

This first layout I made using the Love Potion #9 Scrapbook Kit  (which is still available in the shop while they last!)

I also used our current sketch challenge for this layout. Be sure to play along and link it up here for a chance at winning a 10 gift certificate to the Paper Bakery store!! 


 I love all the die cuts you get in this kit! I have used a ton of them on this layout and I still have sooo many left over for other projects!


For this layout I used the Scrapbook Kit, Capture 365 kit and the Mixed Media Kit! Love how they all go together! 

I did use a few store bits and one or two of my stash supplies on this layout as well: from the Paper Bakery Store:  Days of the Week Chevron Stamp, Pie Chart Stamp, Woodgrain Heart Stamp, Many Clouds Wood Veneer and Shipping Tag Stash supplies: Cork "I love you" circle, Epiphany Crafts round epoxy (over woodgrain stamp), and wood button. 


That pink string that I squished up underneath that cute button and that I used on the tag was actually part of the packaging that Sarah (Owner of Paper Bakery) has hand tied the Capture 365 kit in! Isn't it cute! I love the little details she puts into each kit! 


 This canvas was made entirely with the Mixed Media Kit (except for an exclusive stencil that was part of a signing bonus when you signed up for your kit back when I did last year, and the pink gelato was from the Time's Square Mixed Media Kit from last month. I have detailed instructions on the Paper Bakery Blog on my Mixed Media process and how I made this canvas. 


Phewf!! That was a long post!! Thanks for sticking with me if you're still here!! I really appreciate you taking the time to leave me some love! Thanks so much for stopping by!!
And don't forget to

Follow on Bloglovin
Blessings!


Sunday, February 9, 2014

Dancing Queen?!

Good Afternoon Bloggers!! 
I'm a little late in getting this post up, but don't worry, the new challenge at Scrap & Music just started today, so you still have time to play! So, let's get to it!
Here's the sketch. It totally rocks! 
And the song (if you haven't guessed from my blog title) is Dancing Queen by Abba. You can click HERE to see the lyrics.

I didn't know what I was going to do with these lyrics until I remembered these pictures of my nephew eating his first birthday cake and I thought the lyrics "Dig in" would be perfect for them! 


Here's some close ups:


I hope you stop by the Scrap & Music blog and check out the rest of the fabulous DT's layouts and play along with us!

Thanks for stopping by! Don't forget to 

Follow on Bloglovin

Blessings,


Thursday, February 6, 2014

Love You x forever

Hey there all you crafty peeps! I'm up at the Scrapbook Nerd forum today with day 6 of our "Valentine's Week" of inspiration! I'm also playing along with one of the fellow DT members Michelle's challenge for us to use a sunburst on our layout. Her challenge went perfectly with Studio Calico's sketch this week. 


I always love a good starburst, so I got out my Heidi Swapp Sunburst mask and traced random pieces of paper and then cut them out and pieced them together to make this starburst. When I was finished with the big pieces, something felt like it was still missing, so I cut these little black and white strips and added them for a finishing touch!


Some close ups and details:


I used Crate Paper's Flea Market collection for this layout. When I first saw this line I never thought I'd use it because it's quite feminine, but I fell in love with it and decided that I don't care! I'm going to use it on my boy's pages anyway!! lol There's a lot of it that can be used for boys pages too anyway!


I was inspired by Two Peas in a Bucket's February Mood Board on Pinterest for parts of this layout. I got the idea for the caption on the picture from it.


The title is one of the exclusive cut files you get with your Paper Bakery subscription. I looove this file!


 I wanted them to look like these:

So I cut the title with vellum and stamped it with black Staz On with a Tim Holtz stamp to create a similar effect. I'm really happy with how they turned out.


The doily was die cut with my Cameo using the POW glitter paper. I LOOOVE that paper!! And it cuts brilliantly with the Cameo!! The best part is that the glitter doesn't fall off all over the place, so you don't get all glittery! 

Well, I'm off to bed. We don't have any school tomorrow, so Ethan and I will be working hard making his hockey team's tournament poster tomorrow! The team with the best poster wins a pizza party!! Talk about pressure!! lol I have some pretty cool ideas for it though...hopefully it turns out! I will definitely take pictures to show you all when I'm done!!

Don't forget to 
Follow on Bloglovin


Blessings,


Tuesday, February 4, 2014

Valentine's Tag


Hey Bloggers :) I just wanted to pop in quickly and share a Valentine's Day tag I made. I'm posting it at Scrapbook Nerd too as part of our  "Valentine's Week" where the Design Team has been busy creating some fabulous Valentine's Day projects to inspire everyone! You should definitely go over there and check it out! There's some awesome creations!

I made this tag with one of my favourite collections, the Maggie Holmes Crate Paper collection and a few other bits and pieces that I had kicking around. I finally got around to using that awesome pink polka dot ruffle that I got in one of my old Paper Bakery kits! I've been hoarding that because I love it so much! 


It was a pretty simple tag, but I love how it looks :) I hope you head over to Scrapbook Nerd and check out the other DT's amazing work!

Don't forget to 

Follow on Bloglovin
Blessings!


Monday, February 3, 2014

My "One Little Word" Canvas and a FREE cut file!!

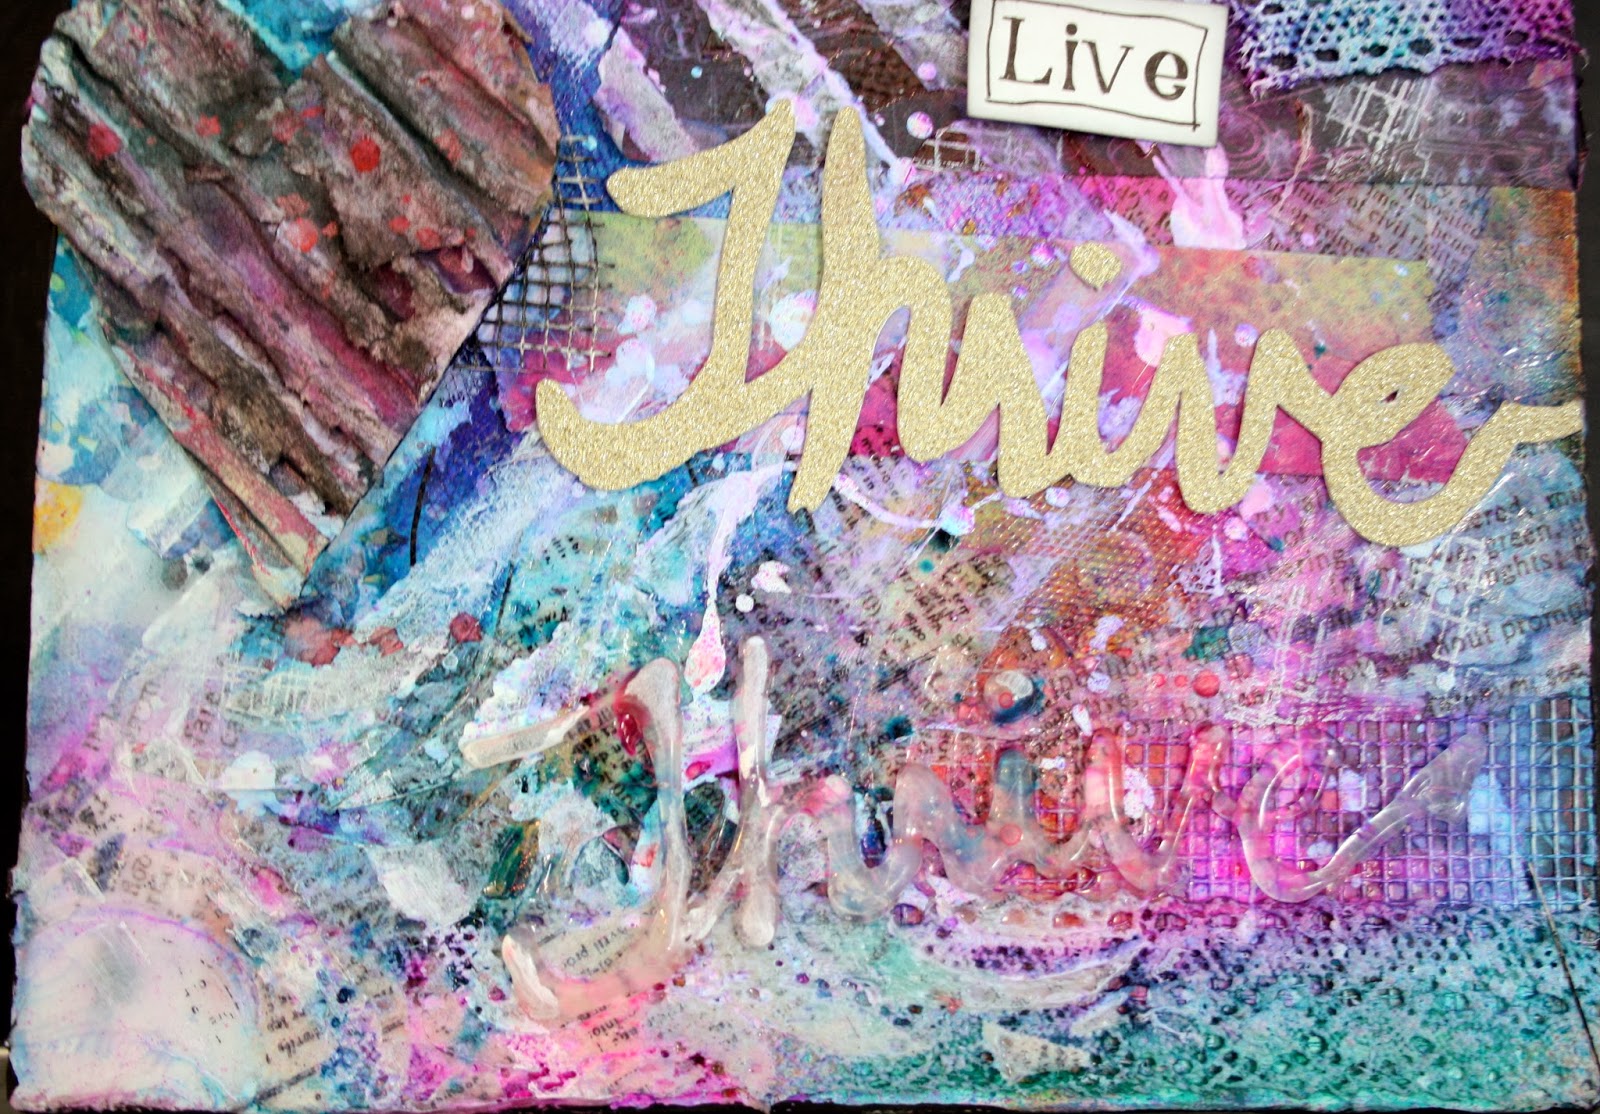
Good Morning Bloggers! I've been thinking about this post for about a month now, and I'm finally ready to reveal my One Little Word for 2014. Now, originally, I had two words, and they were "Nourish" and "Now". They kind of go along with the word that I actually chose, which is "Thrive". I had chose Nourish because it can represent so many aspects of my life, from the obvious; nourishing my body and my family's with healthy food, to the not so obvious; nourishing our souls and minds. I chose the word Now, because I tend to be a great procrastinator and I want to be more productive in 2014. 
But, for the whole month of January, as I thought about my words, I often found myself thinking about the word "Thrive" I would often forget my own words that I chose, and "Thrive" would pop into my head before any of the other words. Now, I'm stubborn though, and I didn't want my word to be Thrive because Ali Edwards had chosen that word. There's nothing wrong with her having that word too, but I just didn't want it to seem like I was just choosing Thrive because she did. But the truth is, I didn't really choose the word Thrive....it chose me! I tried with all my heart to not use that word for this year, and I'm pretty stubborn (Just ask my husband!!), but it just kept popping into my head, until I relented and realized that God has given me that word because He wants me to THRIVE and He wants my family to THRIVE like He has always intended for us!

"The thief comes only to steal and kill and destroy. I came that they may have life and have it abundantly." John 10:10

So, I have embraced my word for the year, and I plan on Thriving abundantly this year! 

I made this canvas so I could hang it up in my house and remind myself daily of my plans to Thrive. 

I actually created my very first ever cut file for this project too! A fellow Paper Bakery DT member Krissy Clark had an awesome tutorial up on the Paper Bakery blog <-----click here to see tutorial. It was on how to create a cut file from your own hand writing. I'm really loving the look of the brush script that's really in now, so instead of using my own handwriting, I did some brush script with a paint brush and then created the cut file with that! I'll share it with you today too! It's not the best quality, but I think it's pretty cool for my first cut file ;)


Here's some close ups: I used lots of stencils, paints gesso, embossing paste, washi tape, lace, tulle, all sorts of goodies to get some good texture on here!


I wanted the word "THRIVE" on here more than once, but I wanted it to be a little more subtle than the gold one, so I heated up my glue gun and wrote the word on my craft mat and waited for it to dry then glued it to my canvas with matte medium.


If you want to use the cut file, feel free to! You can go here to download the studio file, and if you want the png file click here. I just ask that you link back here on your projects and I'd love to see what you create with it too!!


Do you have a word for 2014? I'd love to know what it is!

Don't forget to

Follow on Bloglovin

Blessings,


Saturday, February 1, 2014

Scrap our Stash Guest DT!

Good Morning! This month I was asked to be a Guest Designer for Scrap Our Stash!! They've got some great challenges this month, so I really hope you play along!

Their first challenge is the S.W.A.K challenge!

S.W.A.K - Create a layout with 50% of your layout being RED and/or PINK and include the following stash items:
S. - Stitching (machine, hand or faux)
W. - Washi Tape
A.  - Arrow
K. - Kraft paper/embellishment
Here's what I made: 
As soon as I knew about this challenge I knew I wanted to use this paper from Crate Paper's Bundled up Collection! I also knew I wanted to use this adorable picture of my son Kieran wearing one of his boots and one of his brother Caleb's boots! They went through a bit of a phase were they shared a boot each! They're so close in size that they can get away with it for now ;)

 For my Kraft paper I used my Cameo to cut the arrow background and tucked it in behind the photo. I used a little washi as a layer in there too, and also some on the top right hand corner.

  
I stitched a few messy circles around my layers before I added my photo.


 and I did double duty on my arrows. I used the die cut arrow background and there's a little vellum arrow by the title too...it's hard to see...but it's there ;)


Now it's your turn! Head on over to Scrap Our Stash to check out the rest of the DT's fabulous inspirational designs and then get crafting and link it up for a chance at the prize!!

Don't forget to 

Follow on Bloglovin
Blessings,